 Setup guide
Connect your directory
Let people pick colleagues by name when inviting them to a program, instead of typing email addresses from memory. Your360 reads profiles from your directory — and only from the group you nominate. This is the longer of the two paths; the Your360 AI Directory Lookup integration installs in one click but reads your whole directory.
Which guide is this?
This one covers the custom app: an Okta app you build yourself, where a resource set you control decides exactly which groups Your360 can read. Everyone outside them stays invisible to us.
The one-click guide covers the other way — install our published Okta integration and paste two values. It is far quicker, and it reads every active user in your directory. Pick one; you don't need both.
This is separate from single sign-on
Directory search is its own app in Okta, created by you, with its own credentials. It is unrelated to the Your360 SSO integration — you can have either, both, or neither, and removing one does not touch the other.
What Your360 can see
| Scope | Notes | |
|---|---|---|
| Read user profiles | ✓ | Name and email only, and only for active accounts. |
| Limited to a group you choose | ✓ | Enforced by Okta, not by us — see step 2. |
| Change anything in your directory | — | The permission we ask for is read-only. |
| Read groups, apps, logs or policies | — | Not requested. |
Prerequisites
In Okta, an admin who can create app integrations and administrator roles — Super Administrator.
In Your360, an Organization Admin account. Sign in and open the account menu (your avatar, top right) and choose Admin Settings, then the Integrations tab — or open this link, which lands there directly:
https://app.your360.ai/organization/settings?tab=integrations
Steps 1 to 3 set up who we may see and live under Okta's Directory and Security sections; steps 4 to 7 all happen on a single app. If you already have a group holding the right people, start at step 2.
Names in the screenshots are only examples
Every name and description below is ours, filled in to make the screenshots readable. Name the group, resource set, role and app whatever suits your conventions — nothing in Your360 looks them up by name.
Two of them you will pick again from a dropdown when you assign the role in step 6, so choose names you will still recognise there.
1. Create a group for the people who should be searchable
-
Make the group
In Directory → Groups, choose Add group and give it a name you will recognise later — you will be picking it from a list twice more.
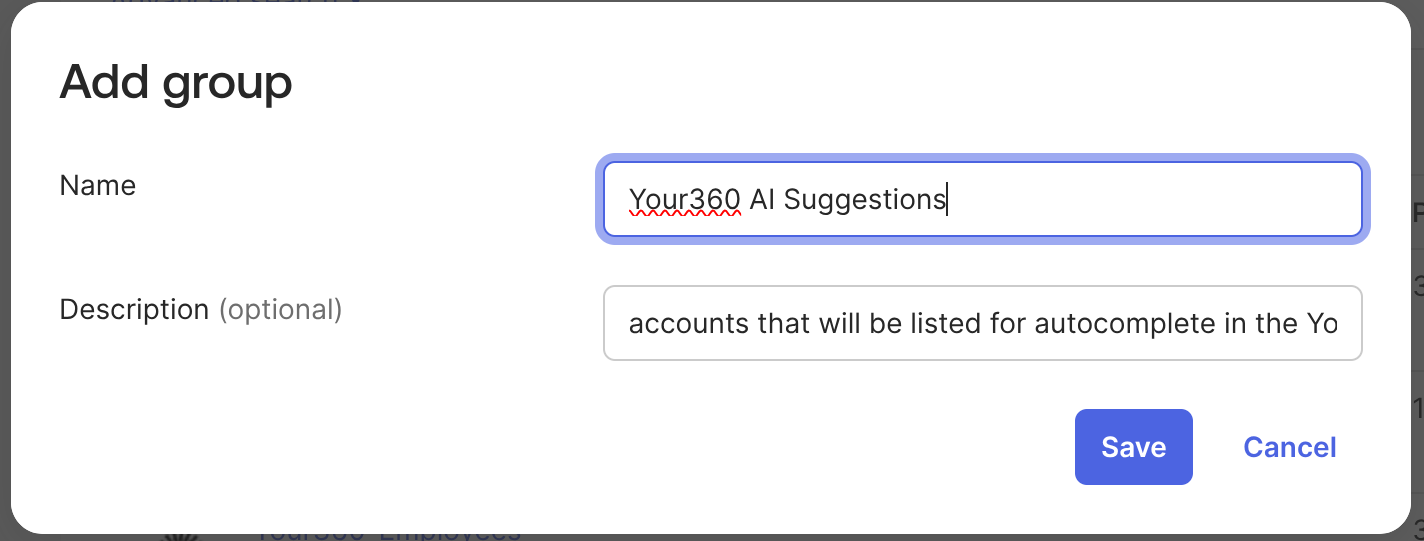
Directory → Groups → Add group. This group is your control over what Your360 can read. Everyone outside it stays invisible to us, including to your own admins using the app.
Which people? Usually more than the ones who sign in. Anyone can be nominated as a feedback provider, and plenty of them never open Your360 themselves — so a group limited to your Your360 users would leave colleagues unsearchable and have people typing their addresses by hand instead.
You do not have to fit everyone into this one group. In step 2 you can point at several groups at once, so a good split is this group for the people who only ever get nominated, plus whichever group already assigns Your360.
-
Add the people
Open the group and use Assign people on its People tab.
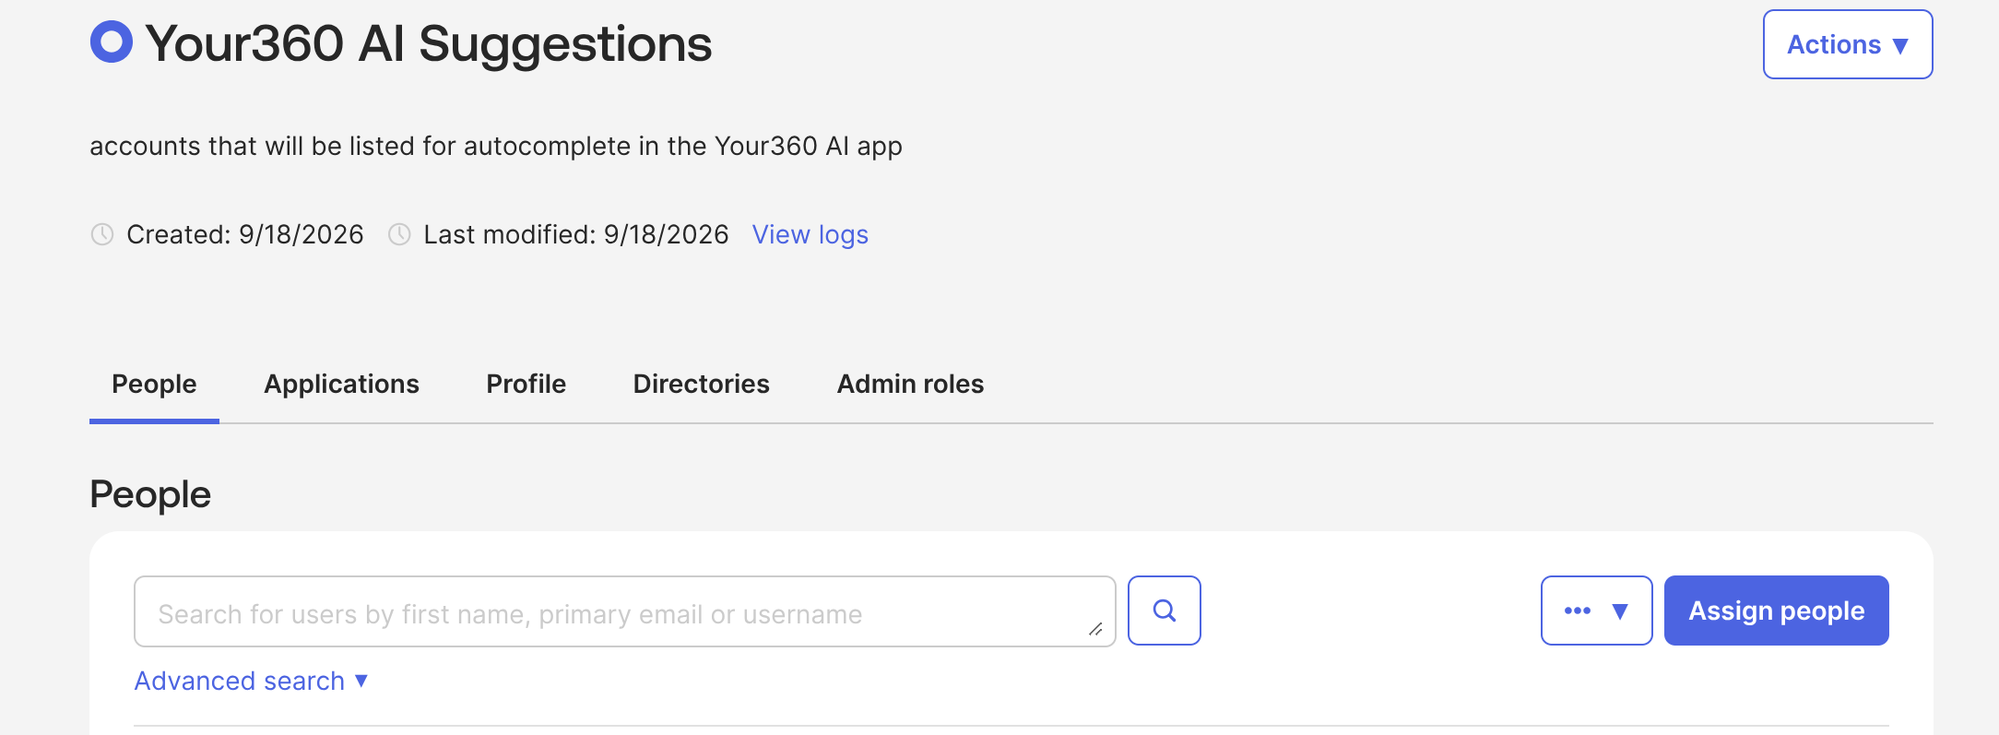
The group’s People tab — who Your360 will be able to find. Membership is not frozen by the rest of this setup: everything below points at the group itself rather than a snapshot of it, so people added later become searchable without revisiting any of it.
2. Create a resource set for that group
-
Open the Resources tab
Go to Security → Administrators, open the Resources tab and choose Create new resource set.
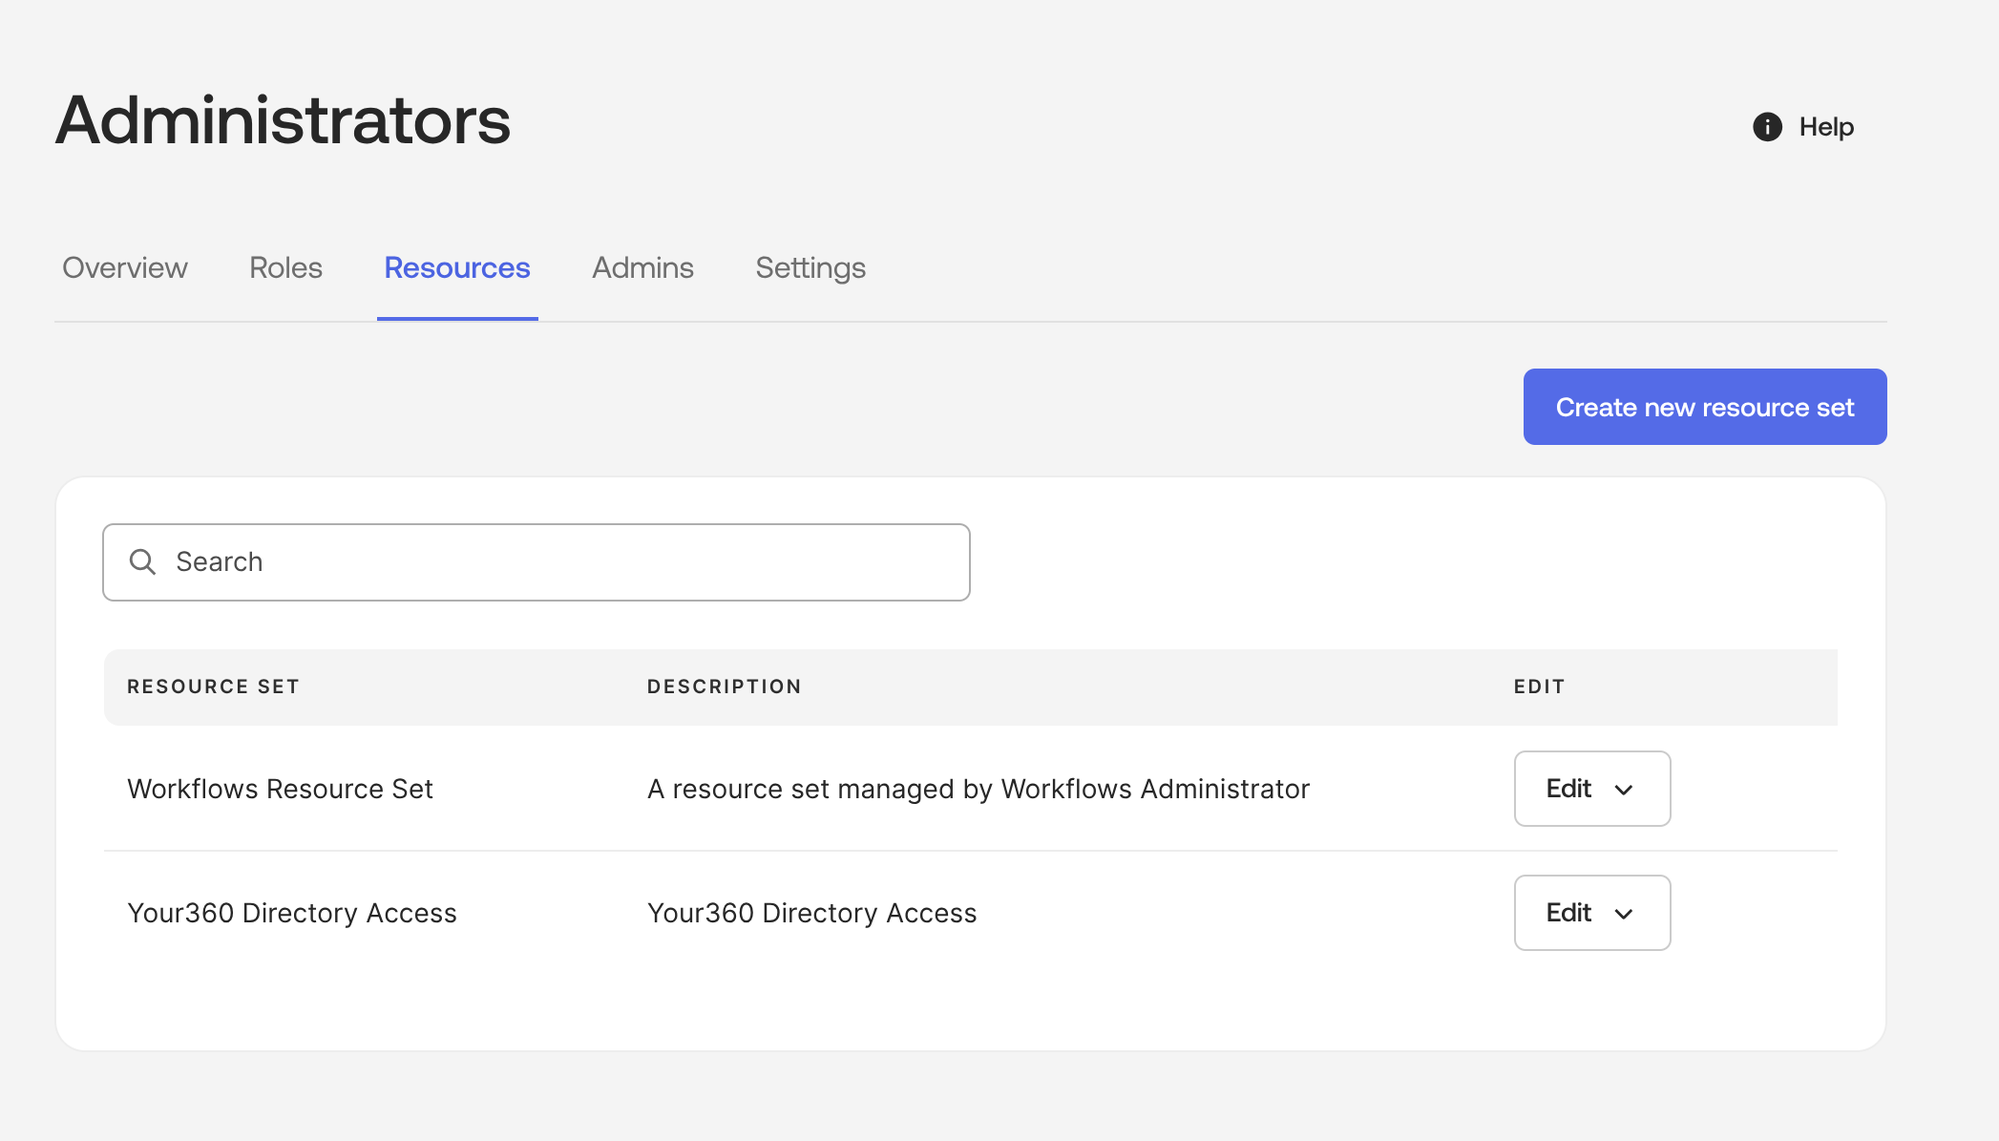
Security → Administrators → Resources. -
Name it and add the resource
Give it a name you will recognise in a dropdown later — you will be picking it again in step 6 — then choose Add resource.
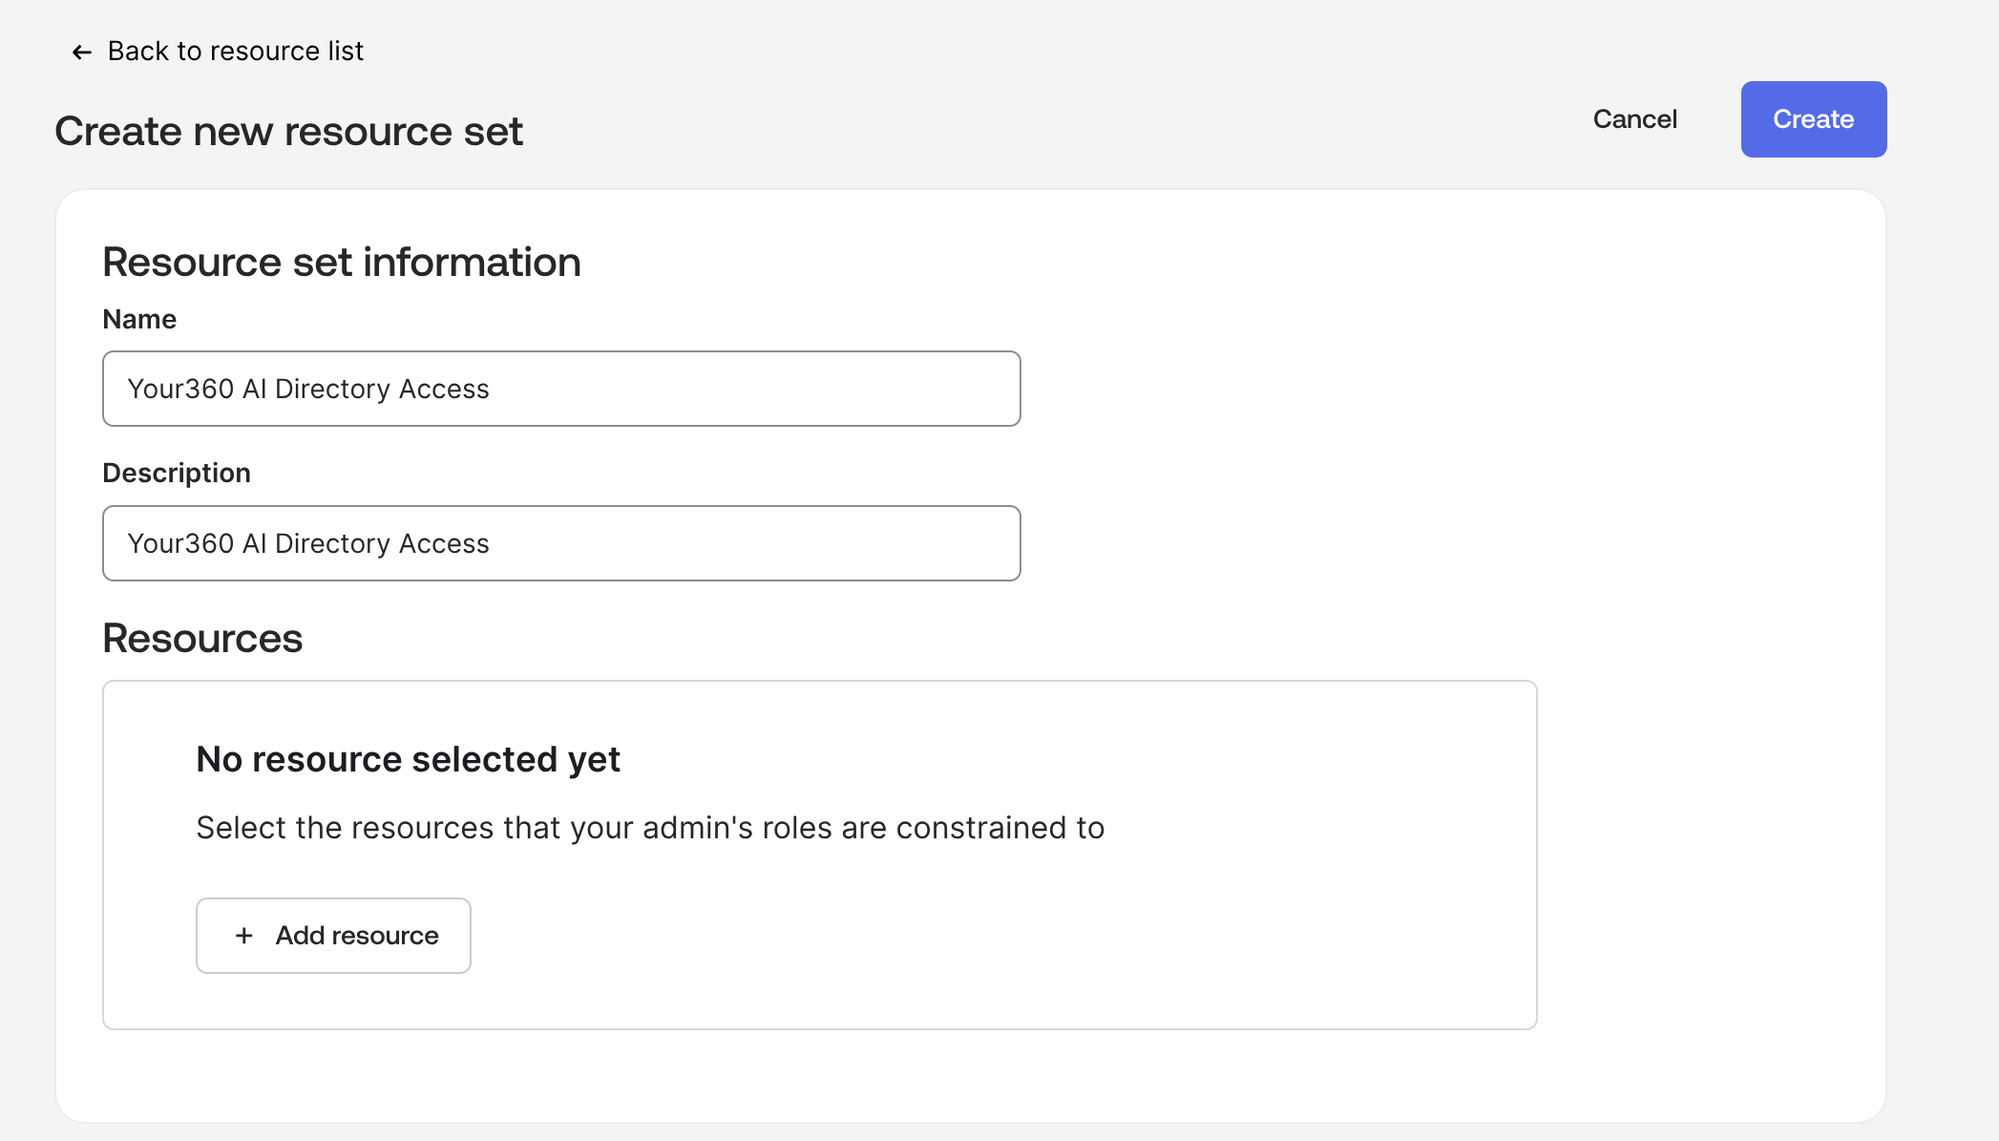
A resource set starts empty; the resource is what limits us. -
Point it at your group
Under Users, choose Select users rather than All users, then search for the group you made in step 1 and tick it.
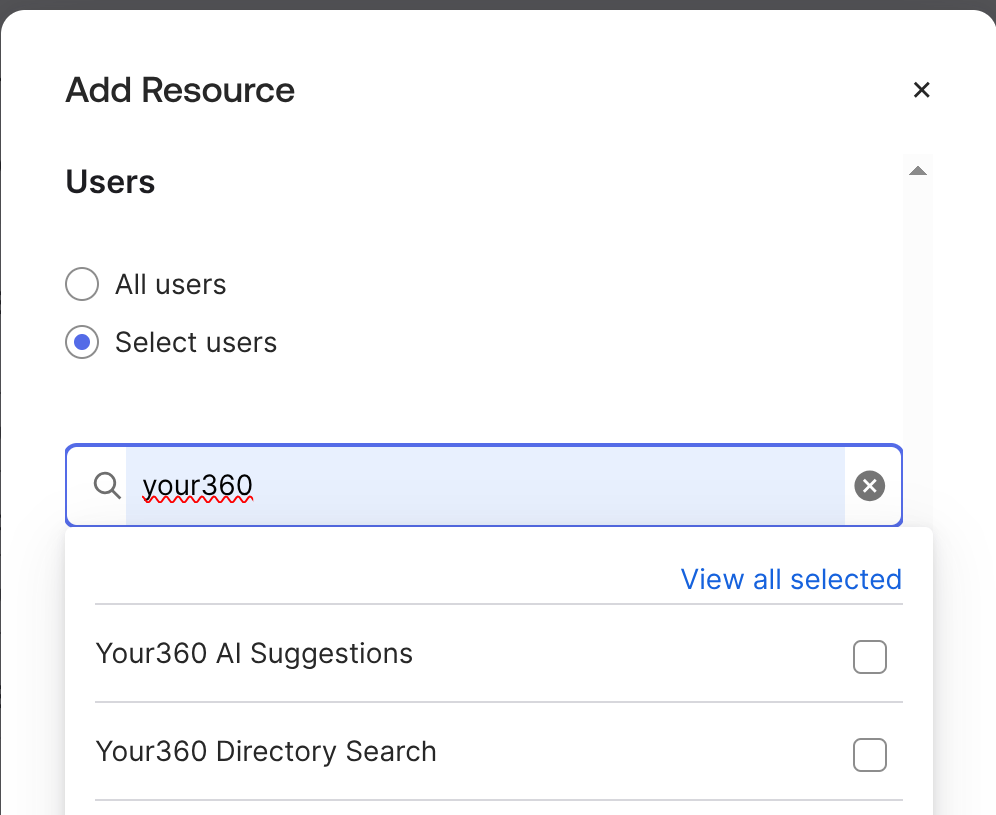
Despite the wording, “Select users” is where you pick groups — the resource becomes the people in them. You can tick more than one group, and the resource set is the sum of them. If you assign Your360 through a group, adding it here alongside the group from step 1 is worth doing: it keeps everyone who uses Your360 searchable automatically as people are given the app, and leaves your step 1 group to cover only the colleagues who never sign in.
All users is the other option, and it means exactly that. Choosing it would let Your360 search your whole directory, which is the thing this setup exists to avoid.
3. Create a read-only custom role
-
Add the role
On the same Security → Administrators screen, open the Roles tab and create a role. Search the permission list for view users and tick View users and their details — that one permission and nothing else.
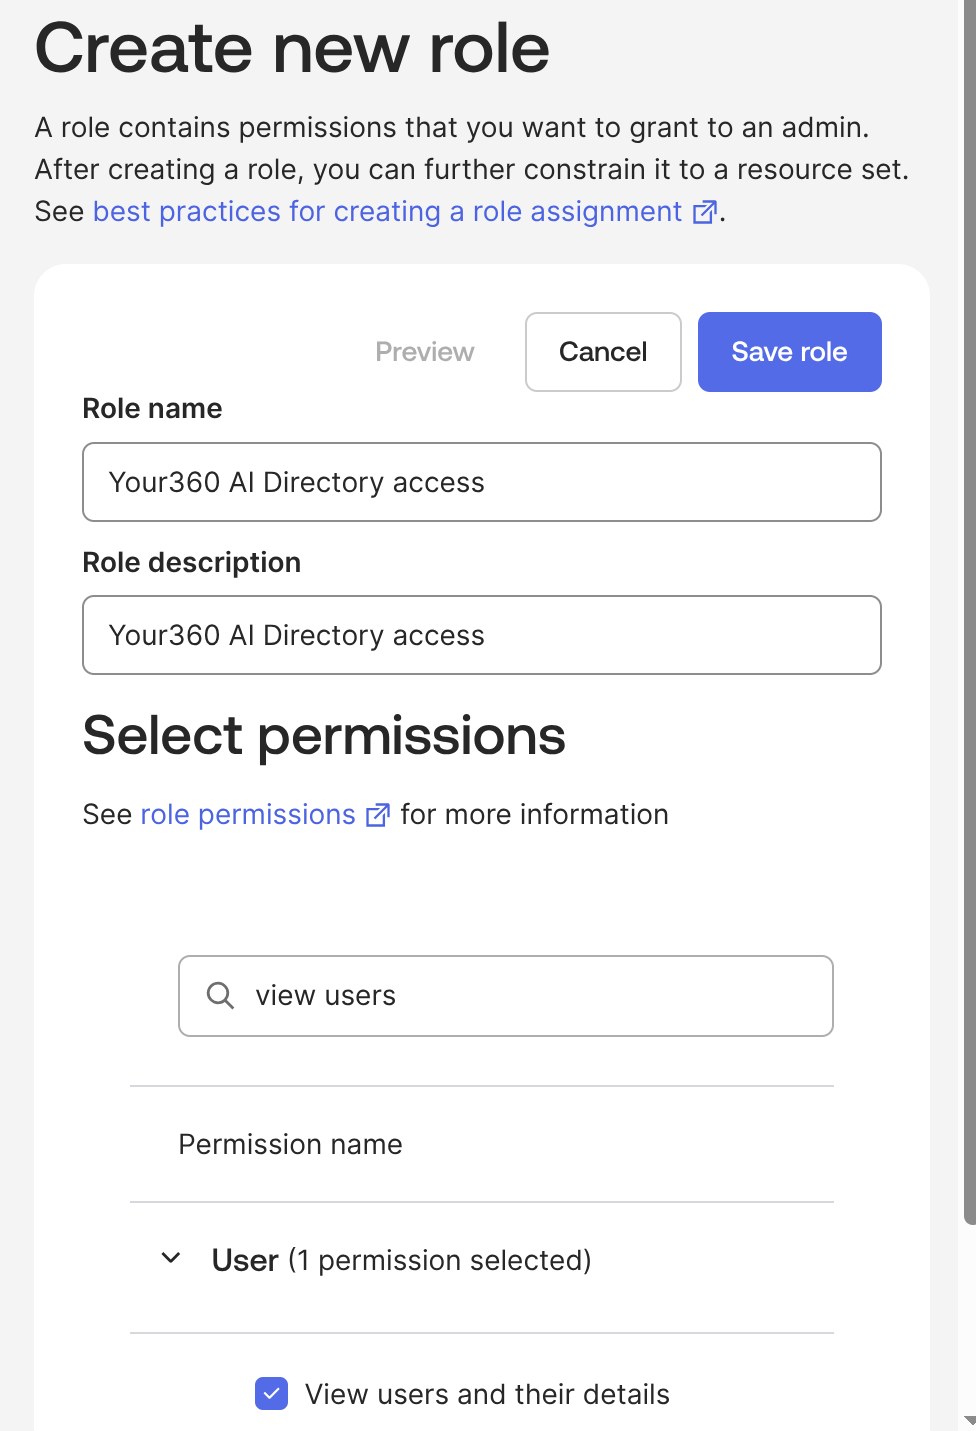
One permission. The role says what may be done, not to whom. Why not a standard role? Okta only lets resource sets pair with custom roles. A standard role such as Read-only Administrator cannot be narrowed to a group, so it would grant far more than this needs.
4. Create the API Services app
-
Choose the sign-in method
Go to Applications → Applications, choose Create App Integration, and pick API Services.
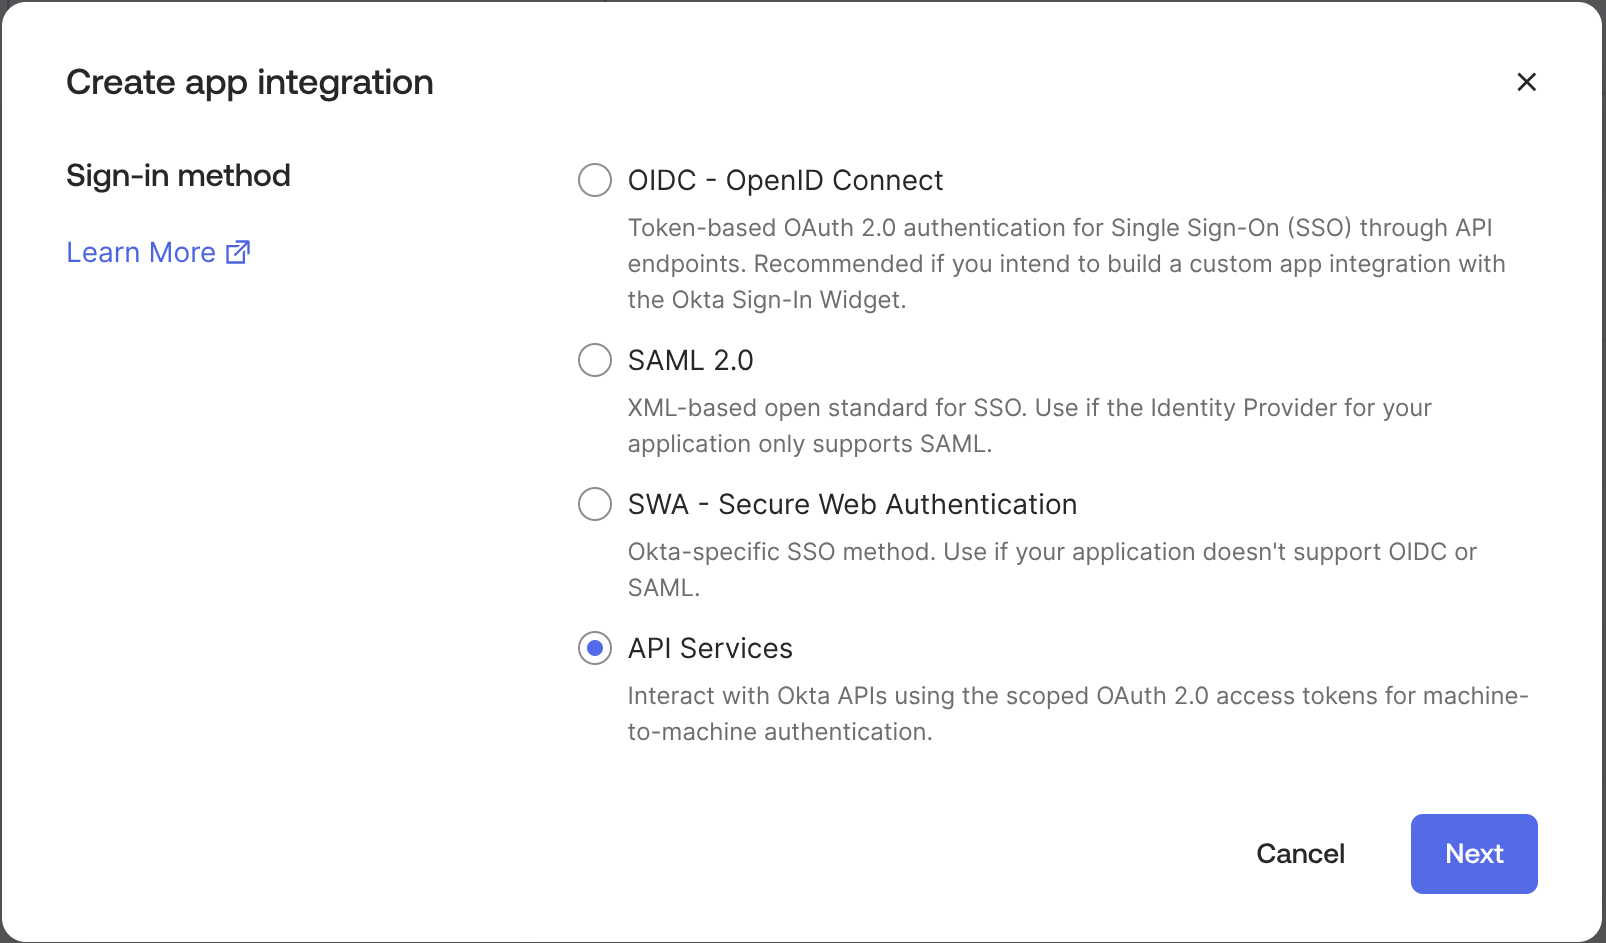
Not OIDC or SAML — those are sign-in methods for people. -
Name it
Give the app a name your team will recognise in an audit later.
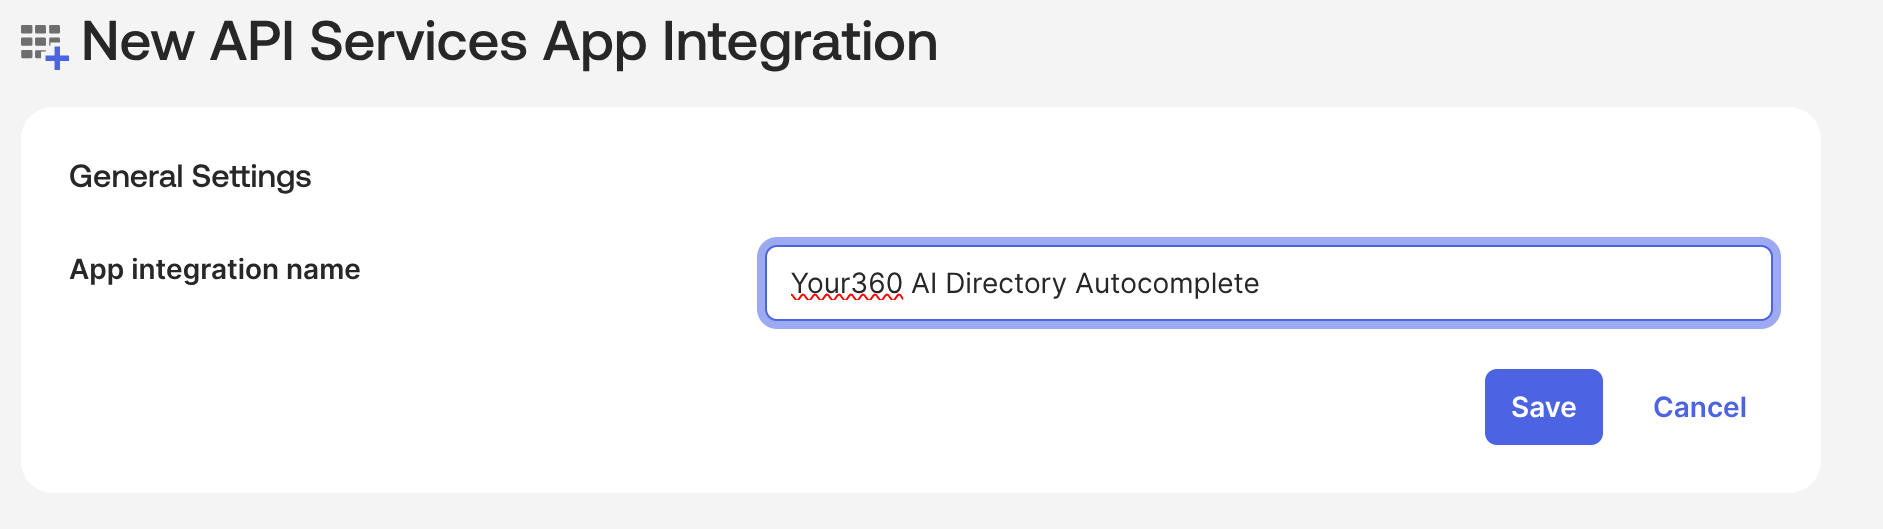
Okta shows this name wherever the app appears — in audit logs especially. -
Add our logo
Optional, but it makes the app easy to spot in your app list. Download the Your360 logo (PNG, transparent background), then on the app's General tab choose Edit under General Settings, upload it as the Logo, and save.

5. Grant the read permission
-
Add the scope
On the app, open Okta API Scopes, find
okta.users.readand choose Grant. That is the only scope Your360 requests.
Okta API Scopes → okta.users.read → Grant. This grants the ability to read user profiles. On its own it returns nobody — the next step decides which people are visible.
6. Assign the role to the app
-
Open the app's admin roles
Still on the app, open the Admin roles tab and choose Edit assignments. A new app starts with none.
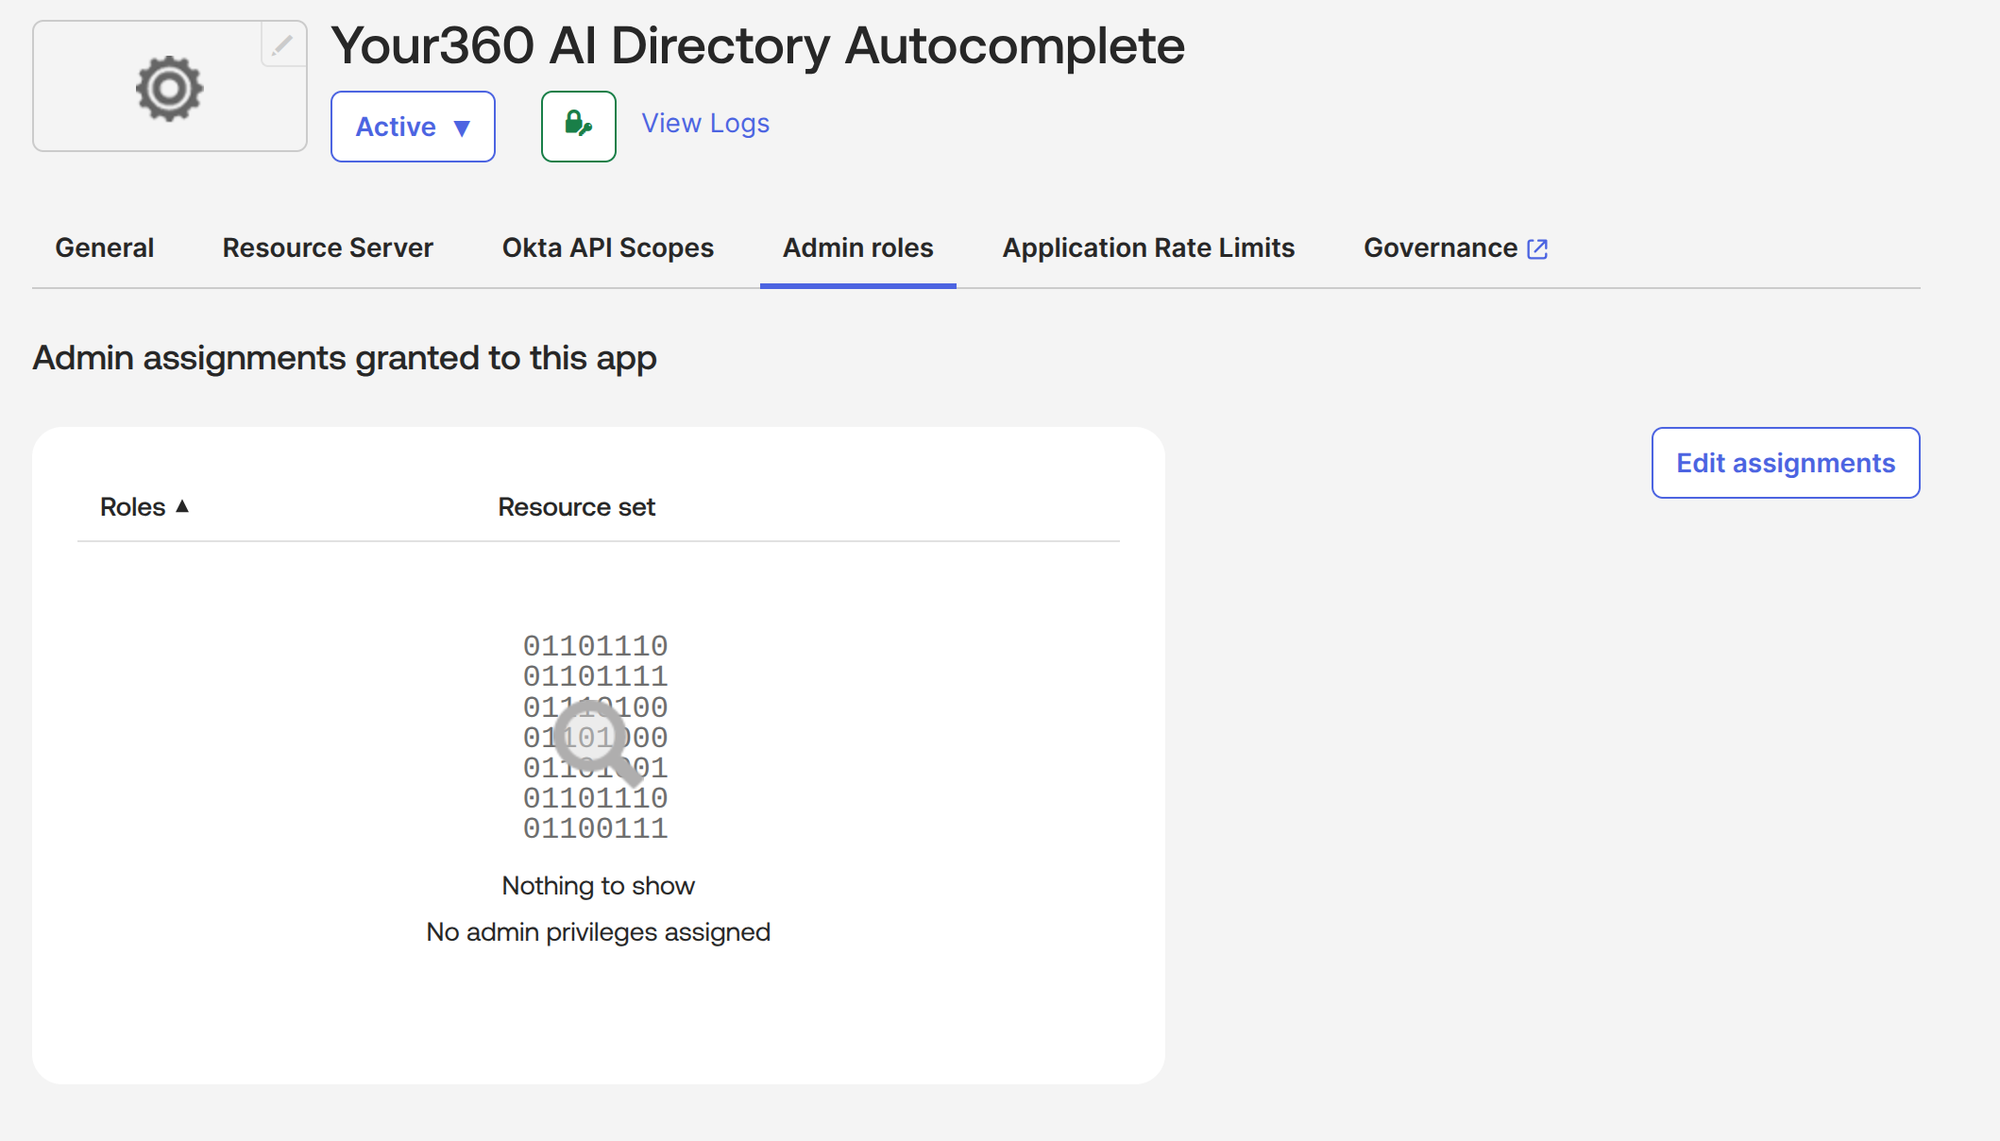
Admin roles → Edit assignments. -
Pair the role with the resource set
Choose Add assignment, then pick the role from step 3 and the resource set from step 2, and save.
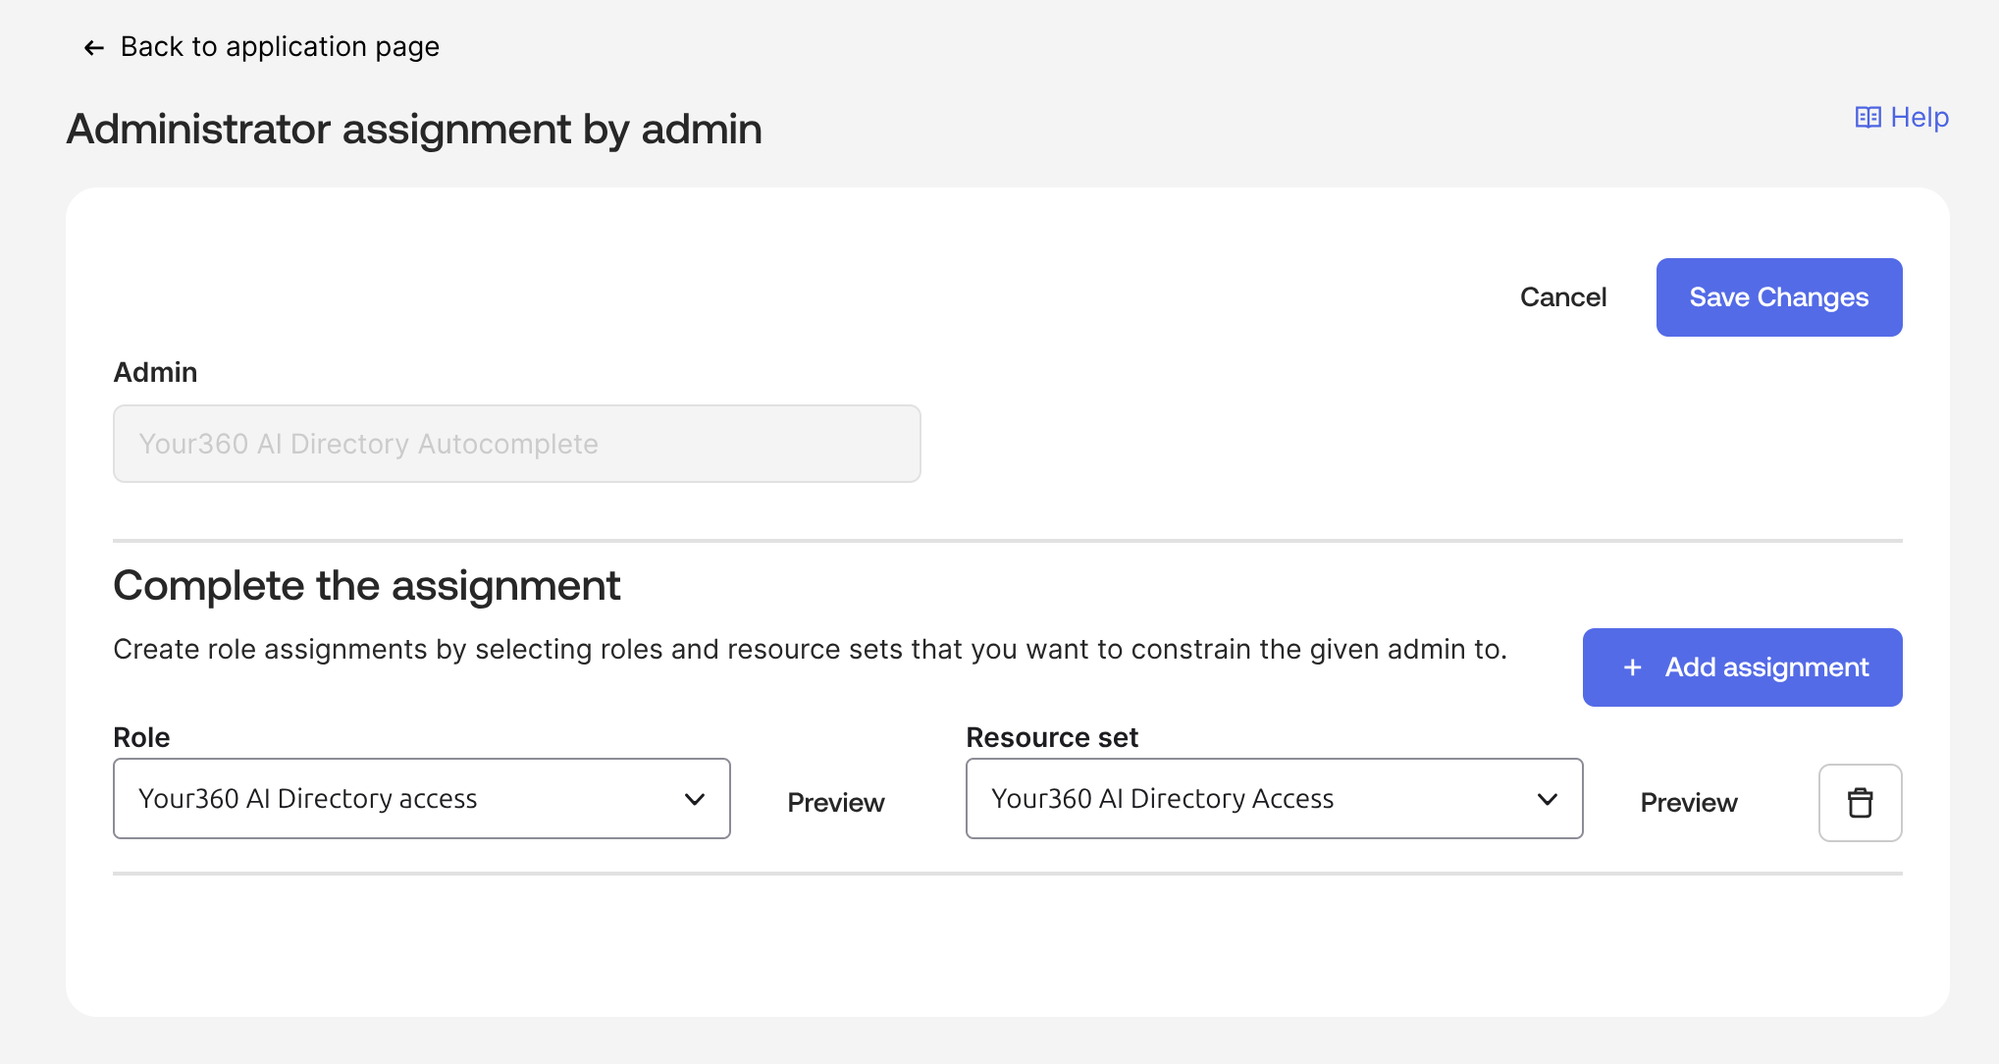
The pair is what constrains us: the role is the permission, the resource set is the people. Okta calls this an admin role, but that is its name for the permission binding rather than a level of privilege. A custom role holding one view permission grants exactly that, over exactly the group in your resource set.
Check nothing else was added
This tab should list your custom role and nothing else. If your org has Public client app admins enabled, Okta assigns Super Administrator to service apps automatically once scopes are granted — which would override the limit you just set. Remove it if it appears.
7. Generate the keypair — last, on purpose
Okta shows the private key once. Leaving this until the end means you copy it and paste it into Your360 straight away, instead of holding it somewhere while you finish the rest.
-
Open Public keys
On the app's General tab, find Public keys and choose Edit, then Add key.
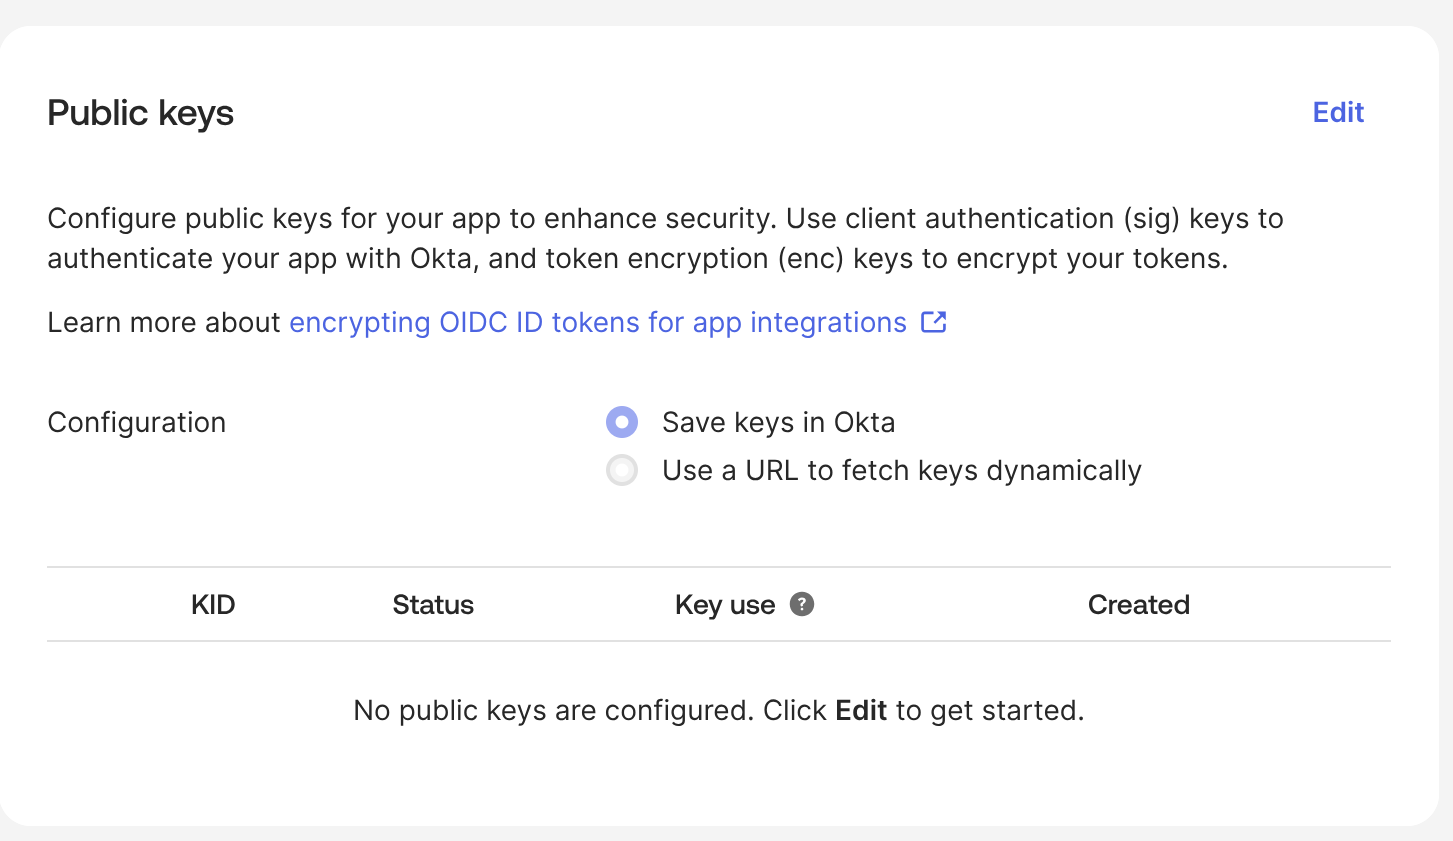
General → Public keys → Edit. -
Generate, and copy the private key
Choose Generate new key. Okta creates the pair, keeps the public half, and shows you the private half under Private key – Copy this!. Leave it on JSON and use Copy to clipboard, then Done.
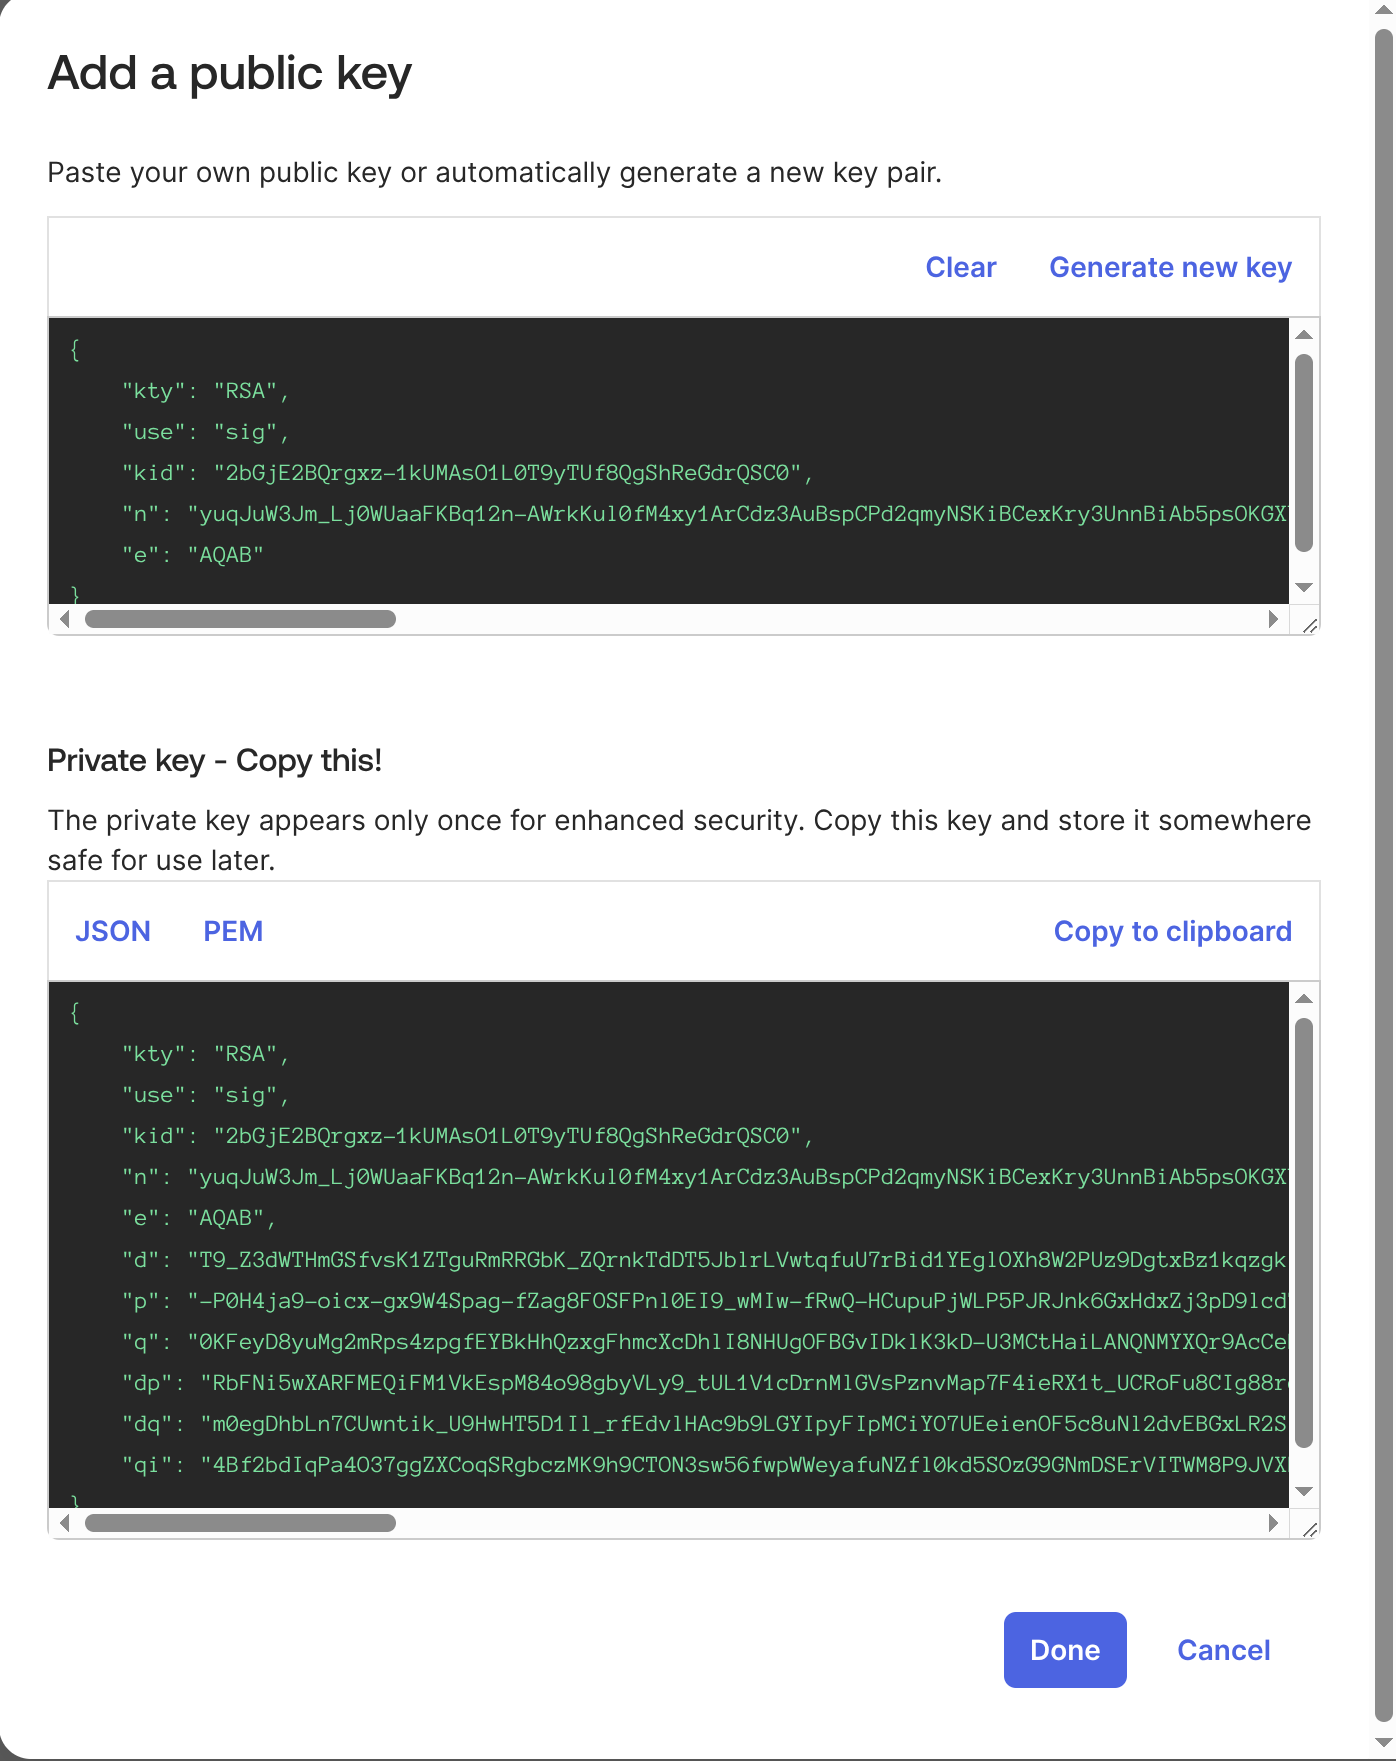
This is the only time the private key is shown. Lost it before pasting it into Your360? Nothing is broken — generate another key and use that one. Remove the unused key afterwards so the app carries only keys you hold.
-
Switch the app to key authentication
Back on General, under Client Credentials, choose Edit and set Client authentication to Public key / Private key, then save. Copy the Client ID from this same panel.
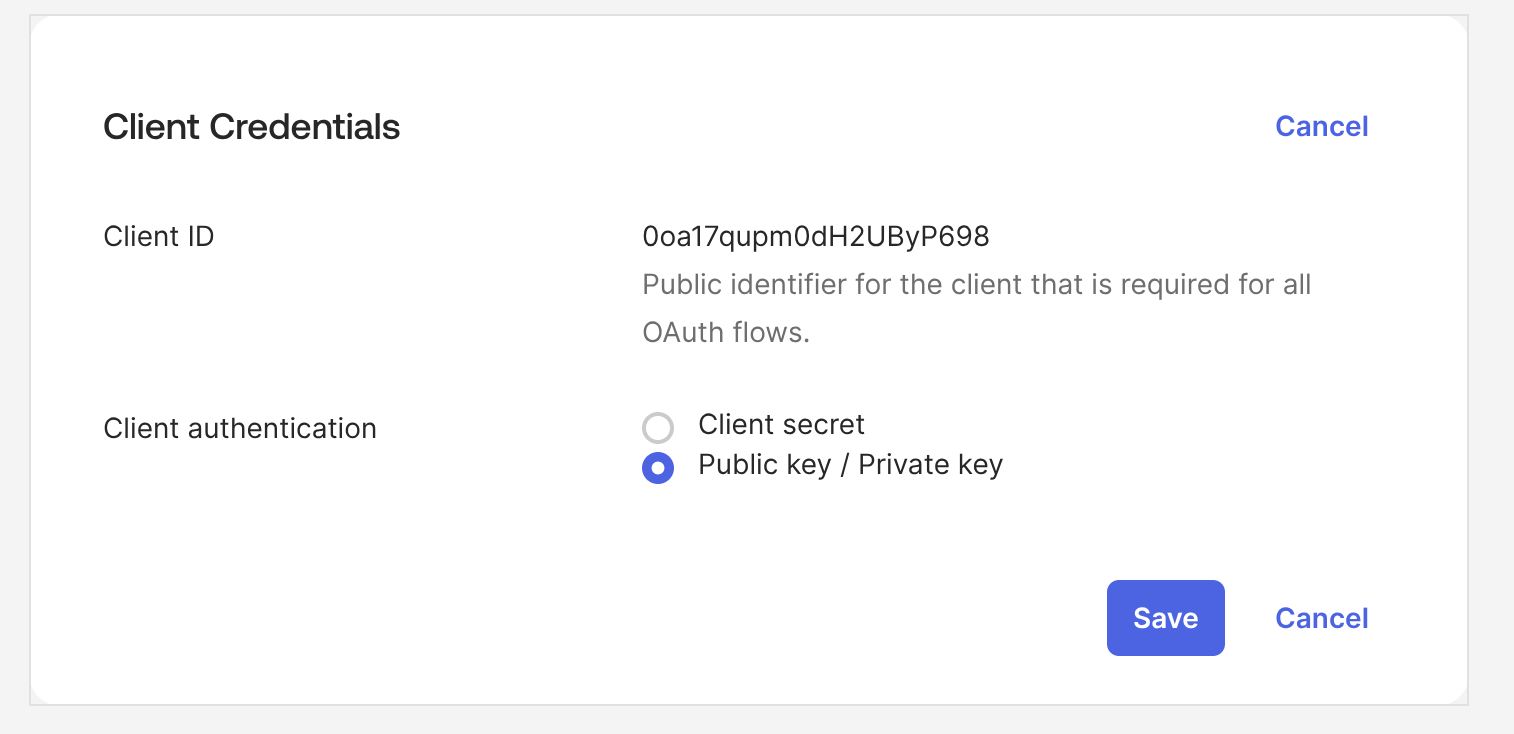
Client Credentials → Public key / Private key. Why not the client secret? Okta refuses it for reading directory data — the org authorization server accepts only key authentication for these scopes, and answers a secret with "Client Credentials requests to the Org Authorization Server must use the private_key_jwt token_endpoint_auth_method." The keypair is also the safer option: the key never travels to us on any request, and removing it from this app revokes our access immediately.
8. Connect it in Your360
-
Paste the details
Open
https://app.your360.ai/organization/settings?tab=integrationsand click Connect on the directory card.Your360 field Value Okta domain ← Your Okta URL, e.g. acme.okta.comClient ID ← Client ID from step 7 Private key ← The private key JSON you copied in step 7 Your360 verifies the credentials against Okta before saving, so a wrong value is reported here rather than turning up later as an empty search.
Checking it works
Search for someone
Still on the Integrations tab, the Directory section below the card lists the people Your360 can see. Search for someone in your group — and for someone outside it, to confirm they do not appear.
Nothing found at all?
An app with the scope but no admin role assignment reads nobody — Okta returns an empty list rather than an error, so it looks the same as a search with no matches. If the directory list is empty, step 6 is the first thing to check.
Results can also be up to five minutes behind a change made in Okta.
Removing access
From either side
In Your360, Disconnect on the directory card. In Okta, remove the public key from the app, or delete the app outright. Either ends our access; neither affects single sign-on.